
Chocolate Depression Cake: A Rich Dessert Born from Hard Times
The Story Behind Chocolate Depression Cake
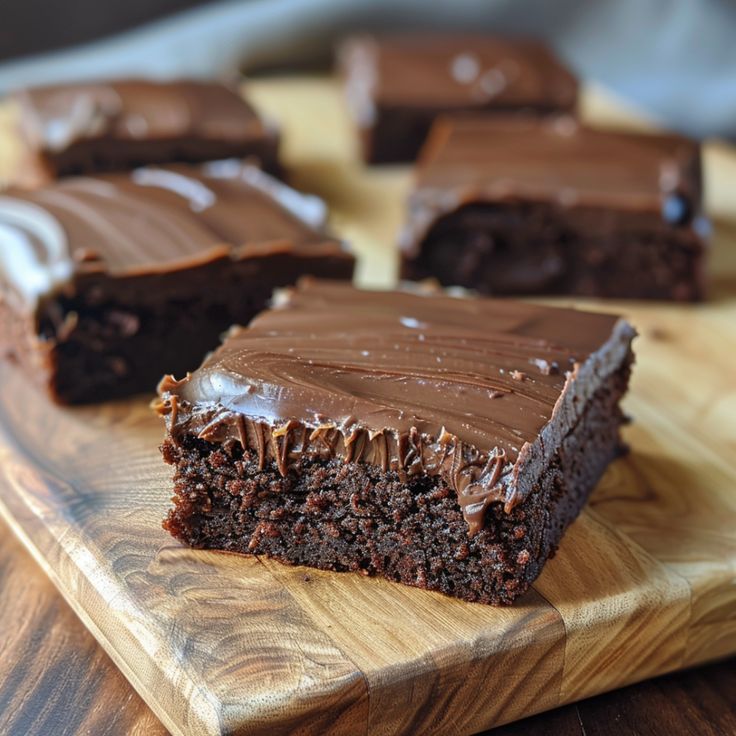
Chocolate Depression Cake, also known as “Wacky Cake” or “Crazy Cake,” is a dessert with a humble past and a rich legacy. It emerged during the Great Depression of the 1930s, a time when luxuries were scarce, and families had to make do with limited pantry staples. Butter, milk, and eggs—now standard baking ingredients—were expensive or unavailable. Yet, out of this hardship came one of the most resilient, resourceful, and surprisingly delicious cakes ever created. What makes Chocolate Depression Cake so remarkable is its simplicity. The original recipe called for basic, affordable items: flour, sugar, cocoa powder, baking soda, vinegar, oil, and water. Despite lacking the richness of eggs or dairy, the result is a moist, deeply chocolatey cake that feels anything but frugal. Today, it stands as a testament to creativity and resilience in the kitchen. More than just a dessert, Chocolate Depression Cake tells a story. It speaks of families gathering around tables during hard times, finding comfort in a sweet treat that felt like a luxury. In modern kitchens, it continues to bring joy, not just for its flavor but for its accessibility—perfect for vegans, those with allergies, or anyone short on ingredients.
Why Chocolate Depression Cake is Still a Favorite Today
Despite its origins nearly a century ago, Chocolate Depression Cake remains popular—and for good reason. First, it’s incredibly easy to make. There’s no need for an electric mixer, fancy tools, or even a separate bowl. Many original versions were mixed right in the baking pan. The ingredients list is short, the instructions are straightforward, and cleanup is minimal. It’s a true one-bowl wonder. Second, it’s vegan by default. Because it contains no eggs or dairy, it’s suitable for a wide range of dietary needs. Whether you’re cooking for someone with food allergies or just want a simple, plant-based dessert, this cake fits the bill without sacrificing flavor or texture. Third, it’s endlessly adaptable. You can frost it, glaze it, dust it with powdered sugar, or serve it plain. It holds up well to variations, like adding coffee for depth, spices for warmth, or fruit for contrast. Best of all, it tastes amazing. The texture is soft and moist, the crumb is tender, and the cocoa gives it a satisfying richness that rivals more complex chocolate cakes. It’s comfort food at its best—simple, honest, and unforgettable.
Ingredients for Classic Chocolate Depression Cake
Here’s what you’ll need to make this classic dessert. The following recipe makes one 8-inch or 9-inch square cake. Dry ingredients: 1½ cups all-purpose flour 1 cup granulated sugar ⅓ cup unsweetened cocoa powder 1 teaspoon baking soda ½ teaspoon salt
Wet ingredients: 1 cup water ⅓ cup vegetable oil (or any neutral oil like canola or sunflower) 1 tablespoon white vinegar or apple cider vinegar 2 teaspoons vanilla extract
Optional topping or glaze: 1 cup powdered sugar 2 tablespoons unsweetened cocoa powder 2–3 tablespoons milk or dairy-free milk ½ teaspoon vanilla extract
That’s it! The magic of this cake is that it rises beautifully and has a lovely texture despite the absence of eggs, milk, or butter. You can also customize it easily. For a deeper flavor, substitute brewed coffee for the water. If you want a mocha vibe, add ½ teaspoon of instant espresso powder to the dry mix. Want it a little spicier? Add a pinch of cinnamon or cayenne for a Mexican chocolate twist. The recipe is forgiving and welcoming of creativity.
How to Make Chocolate Depression Cake Step by Step
Step 1: Preheat and prepare. Preheat your oven to 350°F (175°C). Lightly grease an 8×8-inch or 9×9-inch baking pan. For the most authentic experience, you can even mix the ingredients directly in the pan—just make sure it’s unlined and non-stick or glass. Step 2: Combine dry ingredients. In a large bowl (or directly in your baking dish), sift together the flour, sugar, cocoa powder, baking soda, and salt. Stir to combine thoroughly. Step 3: Add wet ingredients. Make three small wells in the dry mixture. Pour the oil into one, the vinegar into another, and the vanilla into the third. Pour the water over everything and stir until just combined. Don’t overmix—stir gently until no dry pockets remain and the batter is smooth. Step 4: Bake the cake. Pour the batter (if using a bowl) into the prepared baking dish. Bake for 30–35 minutes, or until a toothpick inserted into the center comes out clean. Let the cake cool in the pan for at least 15 minutes before slicing, or allow it to cool completely if you plan to frost it. Step 5: Add frosting or glaze (optional). For a quick chocolate glaze, whisk together powdered sugar, cocoa powder, milk, and vanilla until smooth. Pour it over the cooled cake and let it set before slicing. Alternatively, dust with powdered sugar or enjoy it plain.
Tips, Variations, and Serving Ideas
Chocolate Depression Cake is delicious in its simplest form, but you can enhance it in many fun and flavorful ways. Make it a layer cake. Double the recipe and bake in two 8-inch round pans. Stack with a vegan chocolate or vanilla frosting between layers for a more formal dessert. Add mix-ins. Stir in ½ cup chopped nuts, chocolate chips, or dried cherries for texture and bursts of flavor. Walnuts, pecans, or dark chocolate chunks work especially well. Serve with a twist. Top each slice with a scoop of vanilla or coconut milk ice cream. Add a drizzle of raspberry or caramel sauce for a restaurant-style dessert. Make it spicy or seasonal. Add 1 teaspoon of cinnamon and a pinch of cayenne for a warming touch. Around the holidays, consider adding orange zest or peppermint extract for a festive feel. Use it as a base. Chocolate Depression Cake makes a great base for trifles or icebox cakes. Layer with whipped cream and berries in a glass bowl for a beautiful and easy dessert. Keep it fresh. Store the cake tightly wrapped at room temperature for up to three days, or refrigerate it for up to a week. You can also freeze it—either whole or sliced—for up to three months. Just thaw at room temperature before serving.