
Ciabatta Bread – The Italian Classic with a Crispy Crust and Airy Center
Few breads are as beloved and instantly recognizable as ciabatta. With its rustic, flour-dusted crust and soft, hole-filled interior, this Italian classic is perfect for sandwiches, paninis, or simply dipped in olive oil. Whether you’re a home baker looking to try something new or a bread lover curious about what makes ciabatta so special, this post will walk you through everything you need to know.
What Is Ciabatta Bread?
Ciabatta, which means “slipper” in Italian, gets its name from its long, flat, slipper-like shape. It was first created in the 1980s by an Italian baker named Arnaldo Cavallari as a response to the popularity of French baguettes. Cavallari wanted an Italian bread that could rival the baguette’s ability to hold up in sandwiches—especially when stuffed with meats, cheeses, and vegetables. And thus, the ciabatta was born.
Ciabatta is known for:
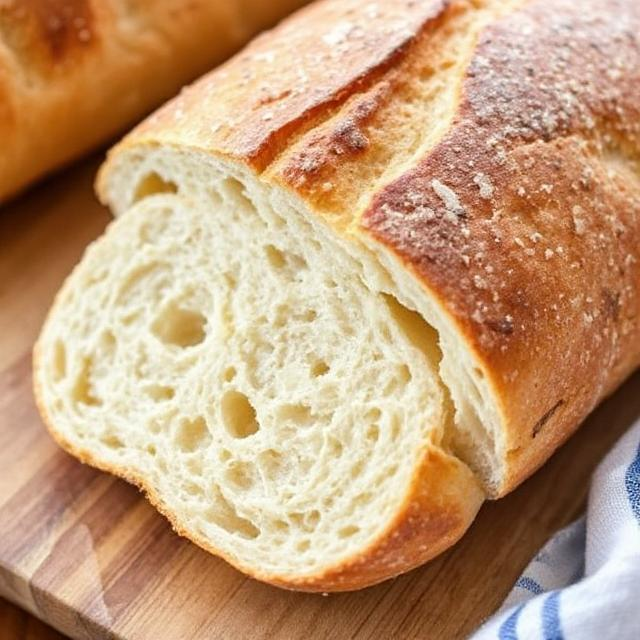
- Its crusty, golden exterior
- A soft, chewy interior full of air pockets
- A mild, slightly tangy flavor
- Its versatility in both savory and sweet pairings
Why You’ll Love Homemade Ciabatta
Store-bought ciabatta has its place, but nothing compares to a fresh, homemade loaf. When made at home, ciabatta offers a deeply satisfying crust, an open crumb, and a flavor that develops beautifully over time. The dough is wet and sticky, which can be a bit tricky to handle at first, but it’s totally worth the effort.
Here’s why it’s worth baking from scratch:
- No preservatives
- Better texture and taste
- Customizable (add herbs, olives, or even cheese)
- The aroma alone is worth it!
Ingredients for Classic Ciabatta Bread
To make two medium-sized loaves of ciabatta, you’ll need the following:
For the biga (starter):
- 1 cup (120g) all-purpose or bread flour
- 1/2 cup (120ml) water
- 1/8 teaspoon active dry yeast
For the dough:
- All of the biga
- 2 cups (240g) all-purpose or bread flour
- 3/4 cup (180ml) warm water
- 1 teaspoon salt
- 1/2 teaspoon active dry yeast
- 1 tablespoon olive oil (optional, for flavor)
Step-by-Step Instructions
Step 1: Make the Biga (Preferment)
Start by making the biga the night before you plan to bake. Mix the flour, water, and yeast in a bowl until well combined. Cover and let it sit at room temperature for 12–18 hours. It should be bubbly and expanded when ready.
Step 2: Mix the Dough
In a large mixing bowl, combine the biga, additional flour, water, yeast, and salt. Stir until a sticky, shaggy dough forms. The dough will be very wet and soft—that’s what gives ciabatta its signature open crumb.
Step 3: Stretch and Fold
Instead of kneading, you’ll use a method called stretch and fold. Every 30 minutes for the next 2 hours, gently stretch the dough and fold it over itself. This builds gluten while preserving the dough’s structure and airiness.
Step 4: Let It Rise
After the final fold, let the dough rise until doubled—this may take 1 to 2 hours depending on your kitchen’s temperature.
Step 5: Shape the Loaves
Flour your work surface generously. Carefully turn out the dough and divide it into two rectangles. Handle gently so you don’t deflate all those beautiful bubbles. Shape into rough slipper shapes and place on parchment-lined baking sheets. Let rest for another 30–45 minutes.
Step 6: Bake
Preheat your oven to 450°F (230°C). If you have a baking stone or steel, use it! Bake for 20–25 minutes or until the loaves are golden brown and sound hollow when tapped.
Cool completely on a wire rack before slicing (if you can wait that long).
Serving Suggestions
Ciabatta is one of the most versatile breads out there. Here are some delicious ways to enjoy it:
- Sandwiches: Pile on roasted vegetables, deli meats, fresh mozzarella, or grilled chicken.
- Paninis: Grill with pesto, turkey, and cheese for the ultimate pressed sandwich.
- Dipping: Tear into chunks and dip into olive oil and balsamic vinegar.
- Breakfast toast: Top with butter and jam, or smashed avocado and poached eggs.
- Soup sidekick: Perfect for dunking into tomato basil soup or minestrone.
Tips for Success
- Use bread flour for a chewier texture and better gluten development.
- Hydration is key – the dough should be wet and sticky.
- Don’t over-handle the dough – keeping the bubbles intact is what gives ciabatta its characteristic holes.
- Let it cool fully before slicing to avoid a gummy crumb.
Variations to Try
Once you’ve mastered the basic ciabatta, try mixing in:
- Chopped olives for a salty Mediterranean twist
- Sun-dried tomatoes for a sweet-savory pop
- Rosemary and sea salt for an herby flavor
- Shredded cheddar or parmesan for a cheesy version
Storage and Freezing
- Room Temperature: Keep ciabatta wrapped in a towel or paper bag for up to 2 days.
- Freeze: Wrap tightly in plastic wrap and foil, then freeze for up to 2 months. Thaw at room temp and reheat in the oven for 10 minutes to revive the crust.
Frequently Asked Questions
Q: Can I skip the biga?
A: Technically yes, but the biga adds flavor and helps develop the dough’s structure. It’s worth the extra step.
Q: Why is my ciabatta flat?
A: This could be from over-proofing, under-proofing, or deflating the dough during shaping. Try to handle it gently and watch your timing.
Q: Can I use whole wheat flour?
A: You can substitute up to 50% of the flour with whole wheat for a heartier loaf, though it may affect the crumb and rise slightly.
Final Thoughts
There’s something deeply satisfying about baking your own bread, and ciabatta is a fantastic way to elevate your skills. It’s a rustic, flavorful loaf with a chewy bite and those signature air pockets that make every bite light and delicious. Whether you use it for sandwiches, soups, or simple snacking, ciabatta is always a good idea.
Try it once, and it just might become your go-to homemade bread. Don’t be afraid of the sticky dough—it’s all part of the magic!